Introduction
In this tutorial, we will understand how to perform hand gesture recognition and tracking in the Tensorflow.js library. Hand gesture recognition is the process of identifying and detecting hands and various landmarks in images or a set of video frames. We will employ the MediaPipe Handpose model, which is a Tensorflow.js pre-trained model to estimate hand poses for a live webcam feed.
Tensorflow.js Handpose Model

Mediapipe Handpose is a hand-pose estimation model, trained using thousands of images and 17 successive layers. With a 12 Mb weight file and high inference speeds of 30 FPS, it is very adaptable and compatible with smaller devices as well. It can identify 21 key hand-point along with the confidence score quite efficiently and also return the coordinates for the bounding box.
This model however does not detect multiple hand gestures in the video and this is something planned in the future releases as per its GitHub repository.
1. Frontend HTML Part
In the subsequent sections, we will build our frontend HTML file.
i) Create Starter HTML File
To begin with we make an HTML file and name it ‘index.html’. This will contain our starter code for importing all the libraries, module files, and stylesheets going forward.
<!DOCTYPE html>
<html>
 <head>
   <meta charset="utf-8">
   <title>TensorFlow.js Tutorial</title>
 </head>
 <body>
 </body>
</html>
ii) Importing Tensorflow.js
To implement pre-trained models available with tensorflow.js API we have to import tensorflow.js itself.
The handpose model requires peer dependencies in order to be unpacked and in order to do that we need our browser to be using a certain TF.js backend.
<!-- Require the peer dependencies of handpose. -->
<script src="https://unpkg.com/@tensorflow/[email protected]/dist/tf-core.js"></script>
<script src="https://unpkg.com/@tensorflow/[email protected]/dist/tf-converter.js"></script>

<!-- You must explicitly require a TF.js backend if you're not using the tfs union bundle. -->
<script src="https://unpkg.com/@tensorflow/[email protected]/dist/tf-backend-webgl.js"></script>
iii) Importing the HandPose model
Tensorflow.js allows us to import pre-trained models using script tags with no external installation required.
<script src="https://unpkg.com/@tensorflow-models/[email protected]/dist/handpose.js"></script>
iv) Importing the script.js File
Later in this tutorial, we will be making a ‘script.js’ file which will encompass functions for doing hand gesture recognition with the Tensorflow.js Handpose model.
For time being, we can just create this file, leave it blank and import it as shown below.
<script src="script.js" type="module"></script>
v) Making and Importing the Styling CSS File
In order to make our project more appealing, we will be applying some CSS.
Let us make the CSS file main.css as below ( The elements mentioned in the CSS file are yet to be made so make sure to go through our tutorial till the end.)
#videoElement {
    width: 640px;
    height: 480px;
}
#videoContainer {
    margin: 0px auto;
    width: 660px;
    height: 500px;
    border: 10px #333 solid;
}
We finally import our main.css file as below.
<link rel="stylesheet" href="main.css">
vi) Importing Bootstrap
We will use Bootstrap 4 for better styling and aesthetic feel.
<link rel="stylesheet" href="https://stackpath.bootstrapcdn.com/bootstrap/4.1.3/css/bootstrap.min.css" integrity="sha384-MCw98/SFnGE8fJT3GXwEOngsV7Zt27NXFoaoApmYm81iuXoPkFOJwJ8ERdknLPMO" crossorigin="anonymous">
vii) Body of the HTML File
We will now define an HTML video element that will eventually fetch the real-time webcam feed. Thereafter we define a canvas element that will broadcast the webcam feed with our model prediction and representation.
Add the following code to the body tag of the ‘index.html’ file:
<body>
    <div class="jumbotron">
        <h3 class="display-4">Hand pose detection using tensorflow.js</h1>
        <hr class="my-4">
        <p>By MLK</p>
    </div>

   <div id="videoContainer">
        <video autoplay="true" id="videoElement" style="display:none"></video>
        <canvas id="canvas" width="640" height="520"></canvas>
   </div>
</body>
2. Javascript Part
From here on out all the code discussed will go inside a javascript file we created named ‘script.js’
In order to start the hand-estimation process on starting our app, we will make use of an IIFE (immediately invoked function expression) as shown below.
(function() {
   // We will put our code here
})();
i) Initializing the HTML Canvas
We use the HTML canvas element to render our webcam feed and then further illustrate the predictions onto the feed. Next, we fetch the video element inside a variable called ‘video’.
var canvas = document.getElementById('canvas');
var context = canvas.getContext('2d');
var video = document.getElementById('videoElement');
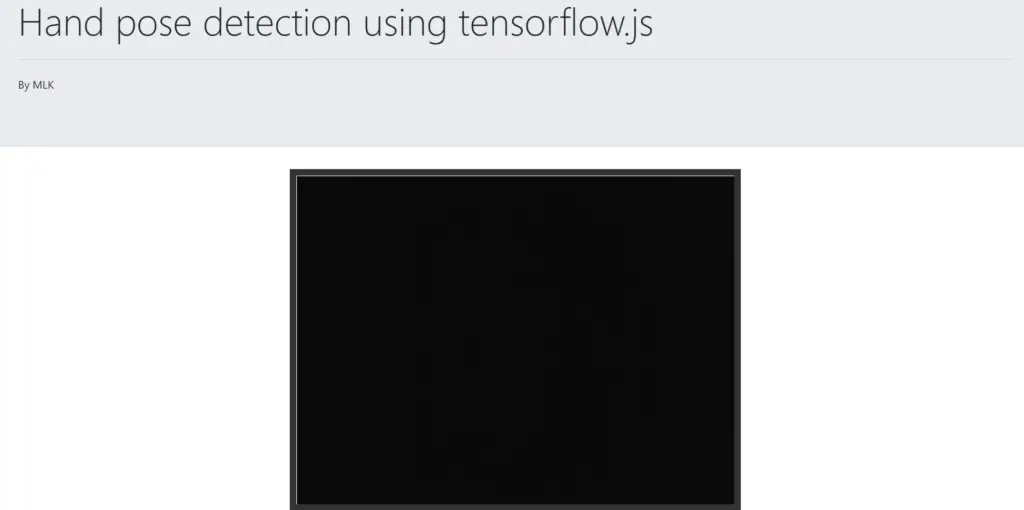
The output should look like this when we run the code till now.
ii) Webcam implementation
a) Initializing the Video
In order to use the webcam on our device, we will be using the ‘navigator’ HTML element object which contains data about the browser. Using the ‘mediaDevices’ class which provides access to devices such as cameras, mics, and speakers, we use the ‘getUserMedia’ function to allow video feed. Next, we set the srcObject (sets or returns the object which serves as the source of the media) to the video stream.
if (navigator.getUserMedia || navigator.webkitGetUserMedia || navigator.mozGetUserMedia || navigator.msGetUserMedia) {
              navigator.mediaDevices.getUserMedia({ video: true,audio:false })
                .then(function (stream) {
                  video.srcObject = stream;
                })
                .catch(function (err) {
                  console.log("Something went wrong!");
                });}
Appropriate error handling is very important in cases of using ‘mediaDevices’ so be sure to add that. To ensure that we get permission to use the webcam with different browsers (Google Chrome, Mozilla Firefox, Microsoft Edge, etc) we encompass the above code in an ‘if’ statement. You can run the code written till now to see if the webcam feed works.
3. Hand Gesture Recognition
In the following sections, we will do the actual hand gesture recognition in Tensorflow.js handpose model.
i) The ‘draw()’ Function
All the upcoming code will be inside an async function draw() that will continuously draw the webcam feed on the HTML page. Its parameters are the video frames, a canvas element along and its width and height.
async function draw(video,context, width, height){
  // The code goes here
}
ii) Initializing the Handpose Model
With the intention to show our webcam feed we call canvas drawImage() function on the ‘context’ i.e. the canvas element. Next, use the load() function to initialize the model and the ‘estimatehands()’ function (with the video element as argument) to get the position of detected hands.
context.drawImage(video,0,0,width,height);
const model = await handpose.load();
const predictions = await model.estimateHands(video);
console.log(predictions);
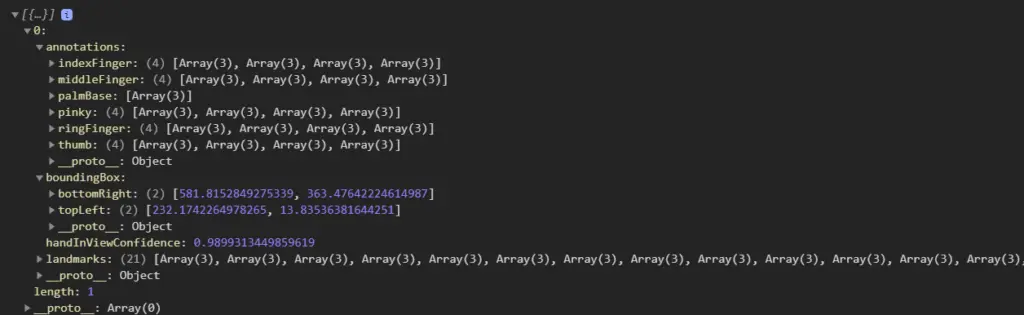
The output prediction array looks like this (in the console). We will go into details in the below section –
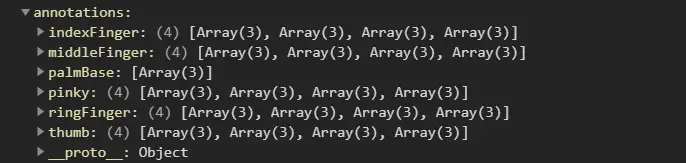
Annotations: Annotations are organized by landmark areas, in alphabetical
order and containing arrays of x, y, and z coordinates.
Output:
Bounding Box: The bounding box contains two main keys, bottomRight, and topLeft,
to indicate the boundaries of the position of the detected hand in the video
stream.
Output:

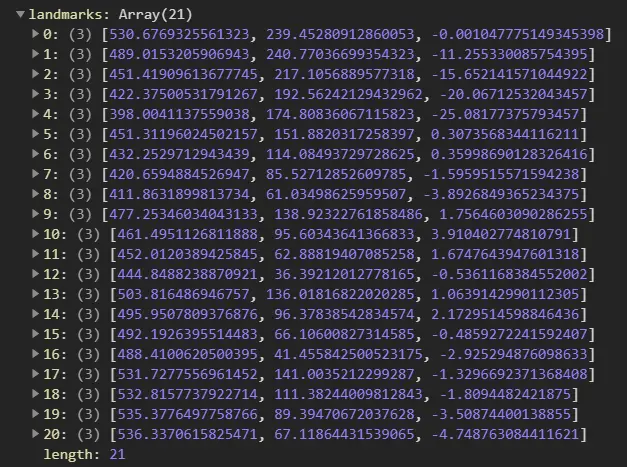
Landmarks: This property returns an array of 21 objects consisting of various hand landmarks. Example: The coordinates of the tip, middle, and base of the 5 fingers(index, middle, ring, pinky, and thumb) including the coordinates of the palm.
Hand In View Confidence: The handInViewConfidence property represents the probability of a hand being present. It is a floating value between 0 and 1.
Output:

iii) Representing the Prediction
The representation code is surrounded by an ‘if’ statement so that it is only executed if there is a minimum of one hand detected. Thereafter, we loop through the predictions and represent them using the upcoming code. We use the ‘handInViewConfidence’ defined in the previous section to fetch the probability of the predicted hand.
if (predictions.length > 0){
           for (let i = 0; i < predictions.length; i++) {
            drawHand(predictions,context);
            var probability = predictions[i].handInViewConfidence;
            var prob = (probability*100).toPrecision(5).toString();
            var text = "Confidence:"+prob+"%";
            context.font = "16pt Comic Sans MS";
            context.fillStyle = "#FF0000";
            context.fillText(text,425,20);
        }
The ‘drawHand()’ is responsible for the visualization of our hand-pose predictions.
We will be defining the ‘drawHand()’ function in the next section so stay tuned.
iv) Relaying the Video Feed
In order to continuously fetch and draw the webcam video frames as well as our predictions, we will be using the ‘setTimeout’. It will call the ‘draw()’ function repeatedly every 250 milliseconds with the parameters (video, context element of canvas, width, and height of the HTML element).
setTimeout(draw,250,video,context,width,height);
v) Adding the video to the page HTML
Finally, to call the ‘draw()’ function, (a function that puts prediction on the screen) we add an event listener to the ‘videoElement’. Hence, every time the webcam is initialized or frames are changed (therefore the event ‘play’) the ‘draw()’ function is called.
video.addEventListener('play',function(){draw(this, context,640,480);},false);
This marks the end of the immediately invoked function.
vi) The ‘drawHand()’ function
a) Defining the finger-joint landmarks
Remember the ‘landmarks’ array? It was an array of 21 objects which consisted of their position. We use this array to fetch the coordinates of different coordinates and sub-coordinates (like base, tip, middle parts of the finger) and plot them on the canvas. i.e. 1st,2nd,3rd,4th object belong to the coordinates of the thumb, 5th,6th,7th,8th belong to index, and so on.
const fingerJoints = {
    thumb: [0, 1, 2, 3, 4],
    indexFinger: [0, 5, 6, 7, 8],
    middleFinger: [0, 9, 10, 11, 12],
    ringFinger: [0, 13, 14, 15, 16],
    pinky: [0, 17, 18, 19, 20],
  };
You must be thinking the zeroth object is a part of each finger? That is true because it actually represents the coordinates of the palm.
b) Defining representational styles for various fingers
Exactly like in the previous section we will now be defining the style properties for each landmark object. So that, when they are represented on the canvas they can be differentiated.
const style = {
    0: { color: "yellow", size: 10 },1: { color: "gold", size: 6 },2: { color: "green", size: 10 },3: { color: "gold", size: 6 },4: { color: "gold", size: 6 },
    5: { color: "purple", size: 10 },6: { color: "gold", size: 6 },7: { color: "gold", size: 6 },8: { color: "gold", size: 6 },9: { color: "blue", size: 10 },
    10: { color: "gold", size: 6 },11: { color: "gold", size: 6 },12: { color: "gold", size: 6 },13: { color: "red", size: 10 },14: { color: "gold", size: 6 },
    15: { color: "gold", size: 6 },16: { color: "gold", size: 6 },17: { color: "orange", size: 10 },18: { color: "gold", size: 6 },
    19: { color: "gold", size: 6 },20: { color: "gold", size: 6 },
  };
c) Function definition
The ‘drawHand()’ is responsible for the visualization of the predictions array. Thus it will take a predictions array and an HTML context element as arguments. We will be writing our code inside an ‘if’ statement that will ensure that we have more than 0 predictions.
const drawHand = (predictions, ctx) => {
    if (predictions.length > 0) {
        //Code goes here
)};
d) Looping through each prediction
predictions.forEach((prediction) => {
        const landmarks = prediction.landmarks;
       // More code here
});
e) Loop through Fingers
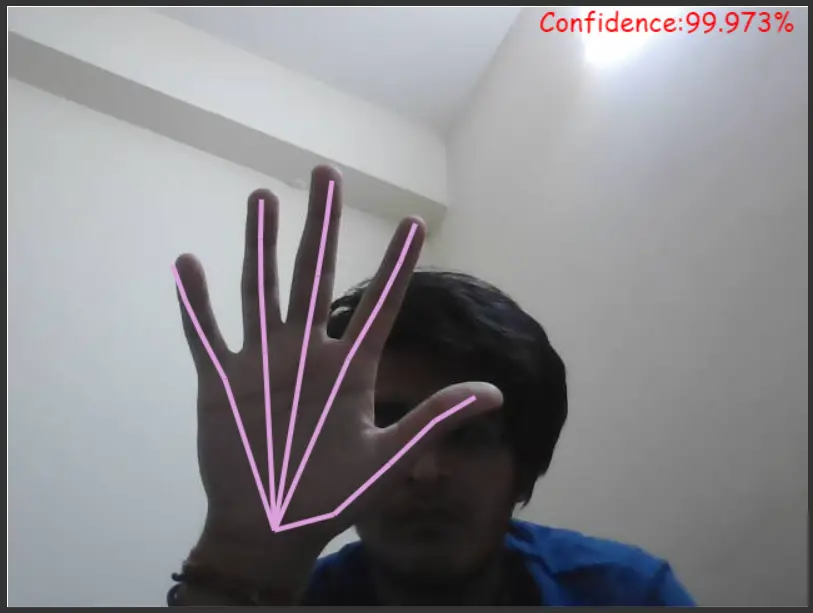
Firstly, we will be accessing the ‘fingerJoints’ key from the predictions array and looping over them in order to access the starting and endpoint for each and every one of them. Next, initialize another ‘for’ loops over the ‘fingerJoint’ array for each finger and draws a line across them using the ‘lineTo()’ canvas function.
for (let j = 0; j < Object.keys(fingerJoints).length; j++) {
          let finger = Object.keys(fingerJoints)[j];
          for (let k = 0; k < fingerJoints[finger].length - 1; k++) {
            // Get pairs of joints
            const firstJointIndex = fingerJoints[finger][k];
            const secondJointIndex = fingerJoints[finger][k + 1];
            // Draw path
            ctx.beginPath();
            ctx.moveTo(
              landmarks[firstJointIndex][0],
              landmarks[firstJointIndex][1]
            );
            ctx.lineTo(
              landmarks[secondJointIndex][0],
              landmarks[secondJointIndex][1]
            );
            ctx.strokeStyle = "plum";
            ctx.lineWidth = 4;
            ctx.stroke();
          }
        }
If we only loop through ‘fingerJoint’ keys:
f) Loop through Landmarks
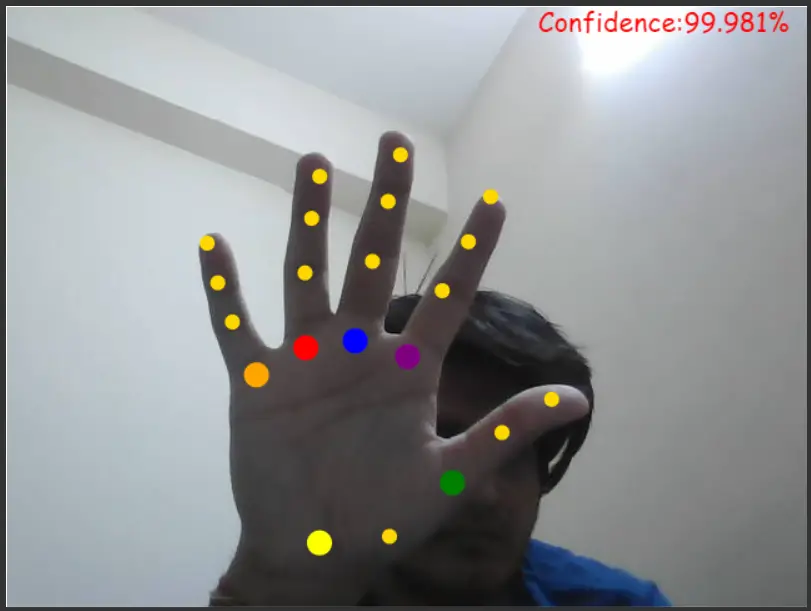
The prominent parts of the joints that you see, that are being represented by different colors need to plot separately. Hence, we loop over the landmarks array to plot each and every one of the 21 landmarks.
for (let i = 0; i < landmarks.length; i++) {
          // Get x point
          const x = landmarks[i][0];
          // Get y point
          const y = landmarks[i][1];
          // Start drawing
          ctx.beginPath();
          ctx.arc(x, y, style[i]["size"], 0, 3 * Math.PI);
          // Set line color
          ctx.fillStyle = style[i]["color"];
          ctx.fill();
        }
If we only represent the landmarks:
Final Output:
Conclusions
Hope you liked our cool tutorial, where we understood how to perform hand gesture recognition and tracking in the Tensorflow.js library. You can find the source codes below –
Source Code Files:
Styling and representation credits: Youtube & Github (Nicholas renotte)