Introduction
In this article, we will learn how to perform the affine transformation on images using the OpenCV cv2.warpAffine() function. First, we will understand what is affine transformation, and its uses. Then we shall cover a few examples of warpAffine() by performing transformations such as rotation, translation, scaling, and shearing.
What is Affine Transformation
In image processing the affine transformation is a geometric transformation that preserves collinearity (the property of points lying on a straight line) and ratios of distances between points lying on a straight line. Effectively it also preserves parallelism of lines in an image. However, it can transform the size, orientation, and proportion of the image.
Affine transformation can be used to apply the following effects on the image:
- Translation: Moving an object without changing its size or shape.
- Scaling: Changing the size of an object along each axis independently.
- Rotation: Rotating an object around a specified point.
- Shearing: Slanting the shape of an object along a particular axis.
Common Use Case of Affine Transformation
Affine transformation is regularly used in computer graphics, image processing, and computer vision tasks. Some of the common tasks include –
- Data Augmentation – An image dataset with rich diversity is always recommended to train machine learning and deep learning models properly. Affine transformation is used to augment the image dataset by applying rotation, scaling, and translation.
- Correct Image Distortion – Affine transformation is often used to rectify geometric distortion in images that result from camera lenses or perspective effects.
- Image Morphing and Animation – Affine transformations can be used in animation and special effects for interpolating between keyframes thus achieving a smooth transition effect.
- Document Processing – Affine transformation is used to deskew and straighten scanned documents, making them easier to process and analyze automatically, for example by OCR (Optical Character Recognition).
Affine Transformation Formula
The formula below depicts the affine transformation. The 2×3 matrix is called the transformation matrix
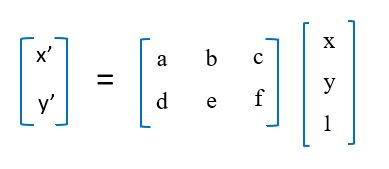
Here:
- are the coordinates of the original image.
- are the coordinates of the transformed image.
- are scaling, rotation, and shearing parameters.
- are translation parameters.
Affine Transformation in OpenCV with cv2.warpAffine()
In OpenCV, affine transformation can be done easily with the warpAffine() function. The syntax of cv2.warpAffine() is as follows –
cv2.warpAffine(src, M, dsize, dst=None, flags=None, borderMode=None, borderValue=None)
- src: This is thee input image.
- M: It denotes the 2×3 transformation matrix.
- dsize: This is the size of the output image (width, height).
- dst (optional): The output image, if provided.
- flags (optional): It is the interpolation method to be used. Possible values are –
cv2.INTER_NEAREST: Nearest-neighbor interpolation.
cv2.INTER_LINEAR: Bilinear interpolation (default).
cv2.INTER_AREA: Resampling using pixel area relation. It may be a preferred method for image decimation.
cv2.INTER_CUBIC: Bicubic interpolation.
cv2.INTER_LANCZOS4: Lanczos interpolation over 8×8 neighborhood. - borderMode (optional): The pixel extrapolation method. Possible values are –
cv2.BORDER_CONSTANT: Adds a constant colored border.
cv2.BORDER_REPLICATE: Repeats the last pixel.
cv2.BORDER_REFLECT: Reflects the pixels about the edge.
cv2.BORDER_WRAP: Wraps the pixels around the edge. - borderValue (optional): The value used in case of a constant border. The default value is 0.
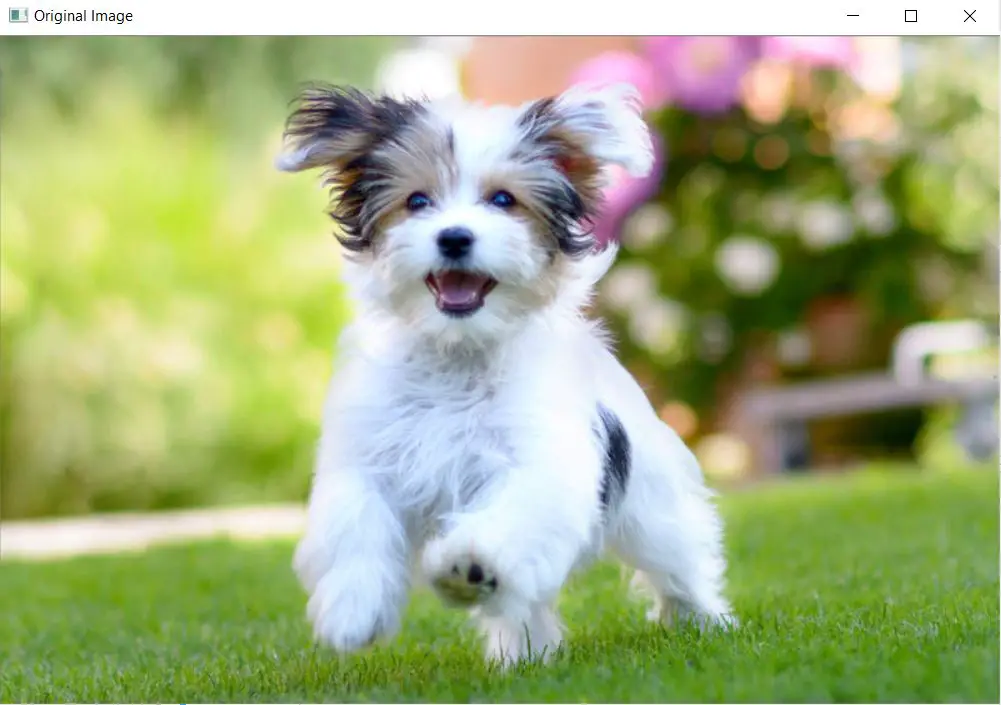
Input Image for OpenCV warpAffine() Examples
The below image will be used in all the examples of the warpAffine function in this article. The below code helps to load the image and show it in a window.
import cv2
import numpy as np

img = cv2.imread('dog.jpg')

cv2.imshow('Original Image', img)
cv2.waitKey(0)
cv2.destroyAllWindows()
Output
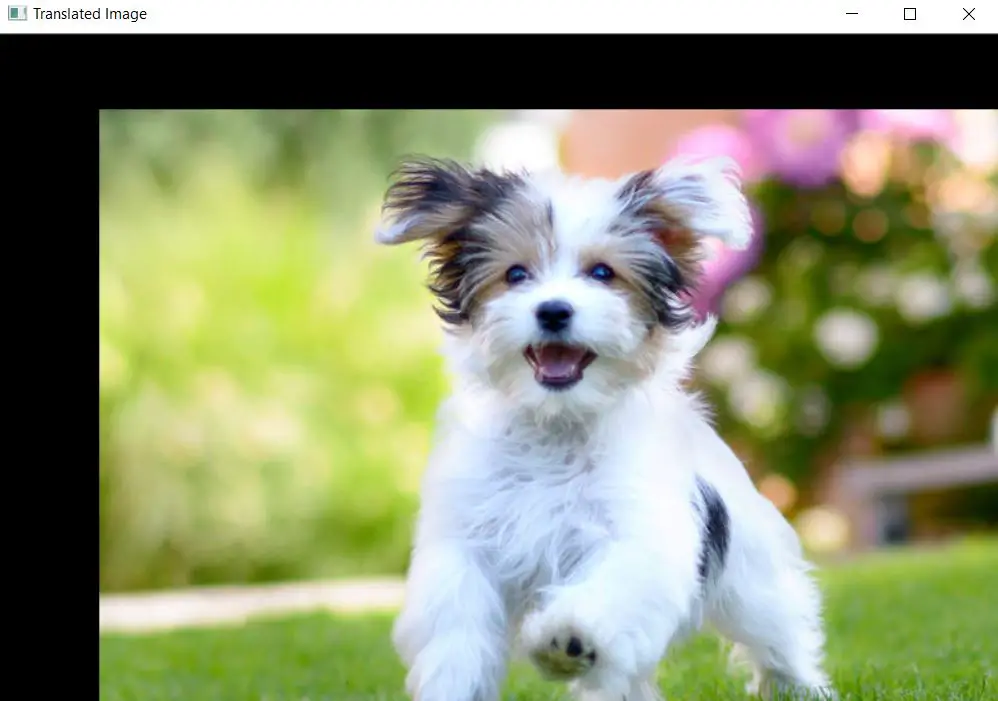
Example 1: Applying Translation
In this example, we first load the image and then extract the dimensions (rows and columns) of the image. Then we create a 2×3 transformation matrix to translate the image by 80 pixels horizontally along the x-axis and by 60 pixels vertically along the y-axis. Finally, we use cv2.warpAffine() function to apply translation on the image.
import cv2
import numpy as np

img = cv2.imread('dog.jpg')
rows, cols = img.shape[:2]

# Define translation matrix
M = np.float32([[1, 0, 80], [0, 1, 60]])

print("The transformation matrix is:\n", M)

# Apply translation
translated_img = cv2.warpAffine(img, M, (cols, rows))

cv2.imshow('Translated Image', translated_img)
cv2.waitKey(0)
cv2.destroyAllWindows()
Output
The transformation matrix is:
 [[ 1.  0. 80.]
 [ 0.  1. 60.]]
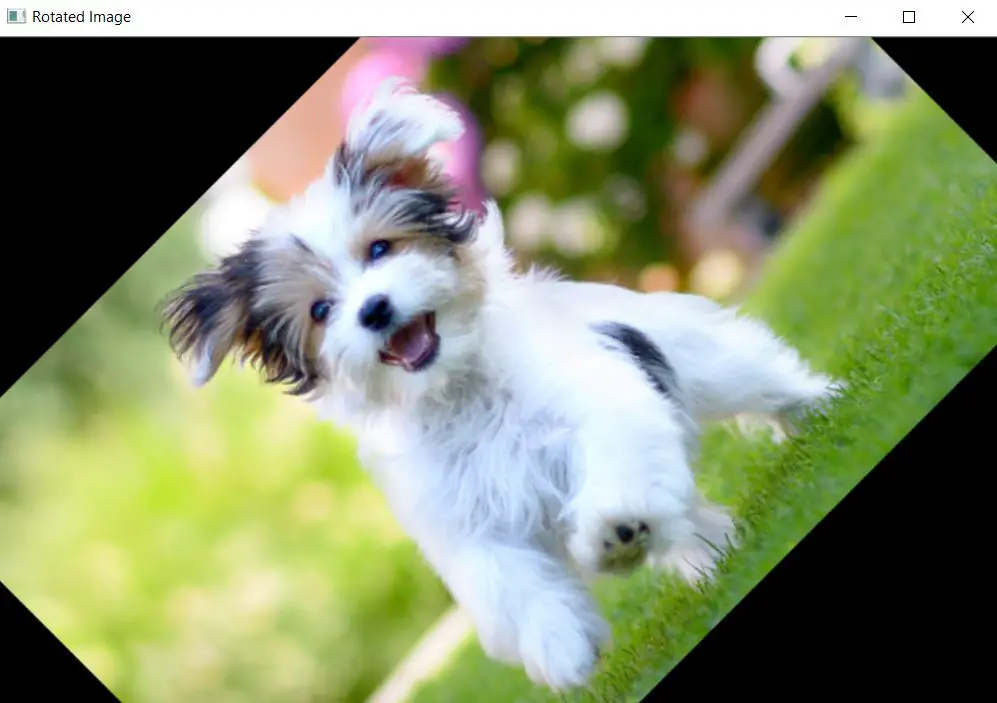
Example 2: Applying Rotation
In this example, we again load and extract its dimension like above. Next, we create a transformation matrix with the help of cv2.getRotationMatrix2D() to rotate the image. We specify the rotation angle as 45 degrees, the center of rotation as the center of the image, and the scaling factor as 1, to maintain the original size. Finally, we apply rotation with the help of the cv2 warpAffine() function.
import cv2
import numpy as np

img = cv2.imread('dog.jpg')
rows, cols = img.shape[:2]

# Define rotation matrix
angle = 45
M = cv2.getRotationMatrix2D((cols/2, rows/2), angle, 1)

print("The transformation matrix is:\n", M)

# Apply rotation
rotated_img = cv2.warpAffine(img, M, (cols, rows))

cv2.imshow('Rotated Image', rotated_img)
cv2.waitKey(0)
cv2.destroyAllWindows()
Output
The transformation matrix is:
 [[  0.70710678   0.70710678 -71.64022305]
 [ -0.70710678   0.70710678 361.0452019 ]]
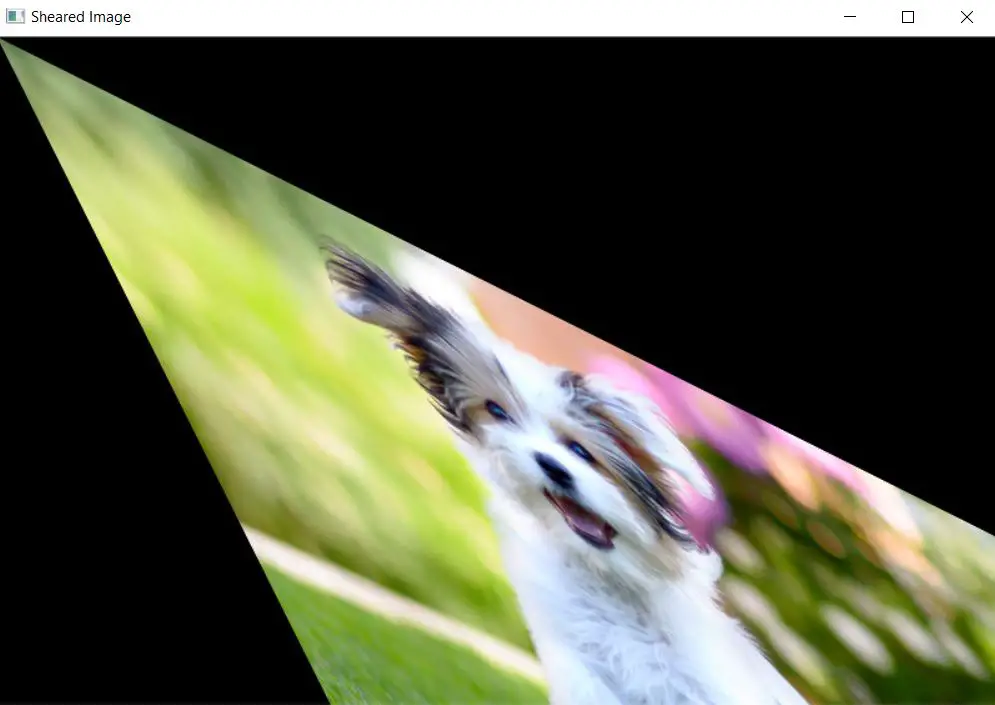
Example 3: Shearing Image
In this example, we show shearing, which distorts the shape of an image by shifting one axis of the image. Just like earlier we load the sample image and extract its dimension. Then we define the transformation matrix ‘M’ for sharing along both the x-axis and y-axis. The shearing factors are chosen as 0.5 for simplicity. Finally, we use cv2.warpAffine() to shear the image as shown below.
import cv2
import numpy as np

img = cv2.imread('dog.jpg')
rows, cols = img.shape[:2]

# Define shearing matrix
M = np.float32([[1, 0.5, 0], [0.5, 1, 0]])

print("The transformation matrix is:\n", M)

# Apply shearing
sheared_img = cv2.warpAffine(img, M, (cols, rows))

cv2.imshow('Sheared Image', sheared_img)
cv2.waitKey(0)
cv2.destroyAllWindows()
Output
The transformation matrix is:
 [[1.  0.5 0. ]
 [0.5 1.  0. ]]
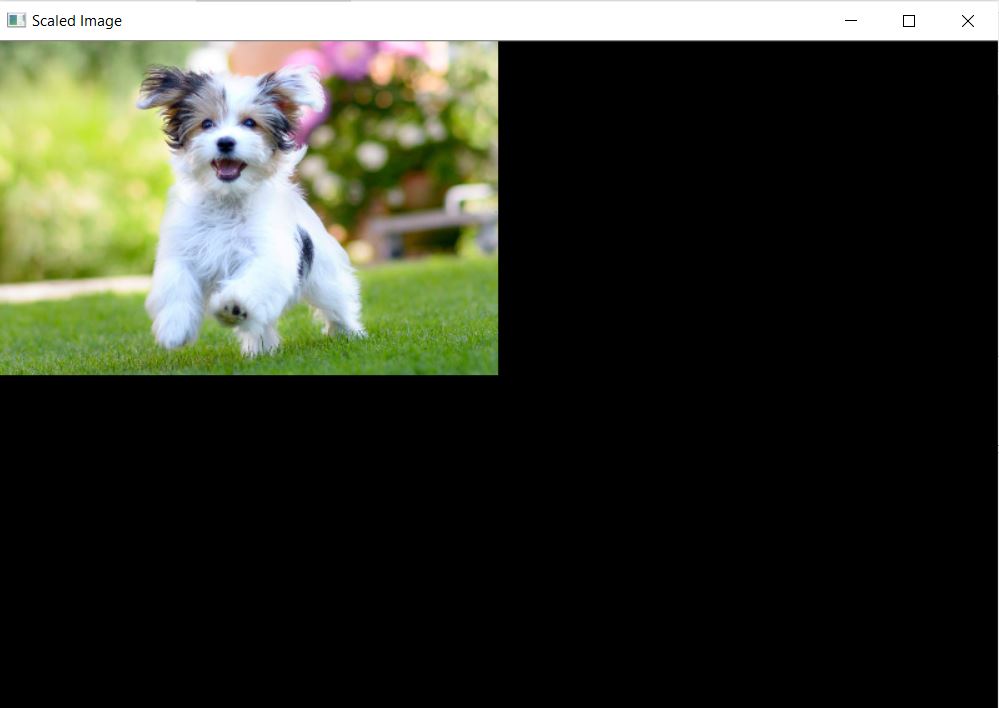
Example 4: Scaling Image
In this example, for scaling, we create a transformation matrix to scale the image by a factor of 0.5 in both horizontal and vertical directions. Then we scale the image with the cv2.warpAffine() function.
import cv2
import numpy as np

img = cv2.imread('dog.jpg')

# Define scaling matrix
scaling_factor = 0.5
M = np.float32([[scaling_factor, 0, 0], [0, scaling_factor, 0]])

print("The transformation matrix is:\n", M)

# Apply scaling
scaled_img = cv2.warpAffine(img, M, (0, 0))

cv2.imshow('Scaled Image', scaled_img)
cv2.waitKey(0)
cv2.destroyAllWindows()
Output
The transformation matrix is:
 [[0.5 0.  0. ]
 [0.  0.5 0. ]]
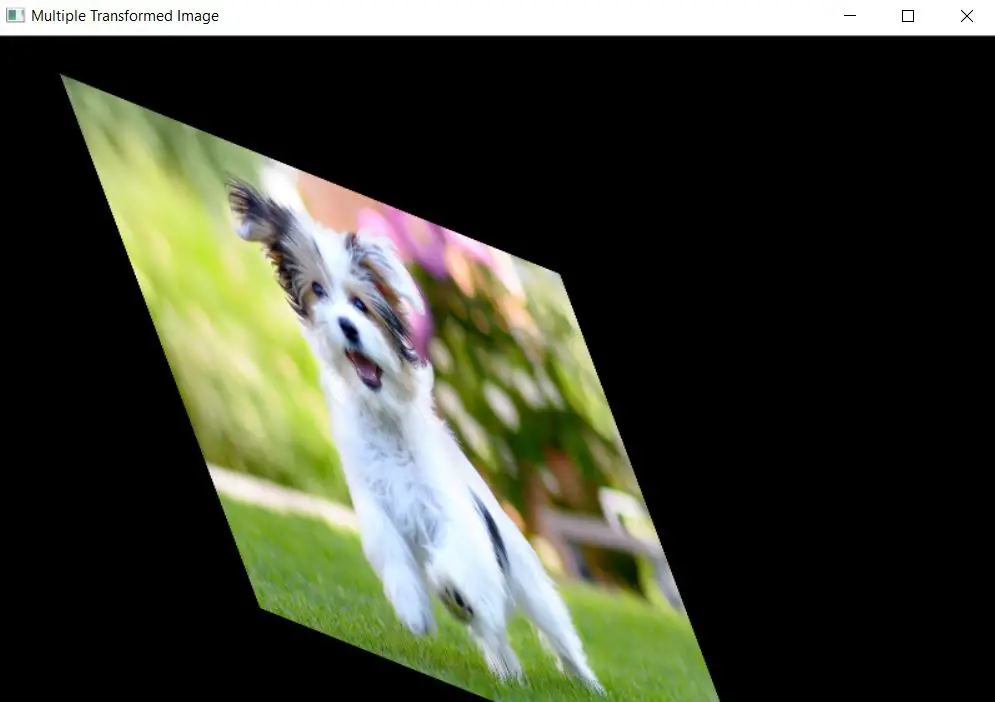
Example 5: Multiple Transformations
In this example, we define a custom transformation matrix ‘ that combines scaling, rotation, and translation. This example shows the flexibility of the warpAffine function in applying arbitrary transformations to images for diverse image-processing tasks.
import cv2
import numpy as np

img = cv2.imread('dog.jpg')
rows, cols = img.shape[:2]

# Define a custom transformation matrix
M = np.float32([[0.5, 0.3, 50], [0.2, 0.8, 30]])

print("The transformation matrix is:\n", M)

# Apply custom transformation
transformed_img = cv2.warpAffine(img, M, (cols, rows))

cv2.imshow('Custom Transformed Image', transformed_img)
cv2.waitKey(0)
cv2.destroyAllWindows()
Output
The transformation matrix is:
 [[ 0.5  0.3 50. ]
 [ 0.2  0.8 30. ]]