Introduction
In this tutorial, we are going to show you how we can draw rectangles in OpenCV Python by using cv2.rectangle() function. Rectangles are commonly used to create a bounding box for object detection hence you should know how to create them in OpenCV Python. We will show you the syntax of cv2.rectangle() along with few examples for a better understanding for beginners.
- Also Read – YOLOv4 Object Detection Tutorial with Image and Video : A Beginners Guide
- Also Read – Introduction to YOLOv5 Object Detection with Example
Rectangle in OpenCV Python : cv2.rectangle()
OpenCV Python has got a rectangle() function that can be used quite easily to create rectangular shapes on an image. Let us see its syntax below –
Syntax
cv2.rectangle(image, pt1, pt2, color, thickness)
- image – It is the image on which the rectangle has to be drawn.
- pt1 – Vertex of the rectangle at the top left corner.
- pt2 – Vertex of the rectangle at the bottom right corner.
- color – It is the color of the rectangle line in RGB.
- thickness – It is the thickness of the line.
It does not return anything and draws the rectangle on the original image in place, this means the rectangle drawn on the image will be permanent.
Examples of cv2.Rectangle() in Python OpenCV
Import Required Libraries
Before going through the examples let us first import some of the required libraries as shown below –
In [1]:
import cv2
import numpy as np
import matplotlib.pyplot as plt

%matplotlib inline
Function to Create Blank Image
We will create a utility function that creates an empty image of the size 512×512 and 3 color channels on which we shall draw rectangles for examples.
In [2]:
def generate_blank_image():

    return np.ones(shape=(512,512,3), dtype=np.int16)
Let us see this function in action by calling it below.
In [3]:
img = generate_blank_image()
plt.imshow(img)
Out[3]:
<matplotlib.image.AxesImage at 0x1e14d0dc9b0>

Example – 1 : Draw Simple Rectangle with cv2.rectangle()
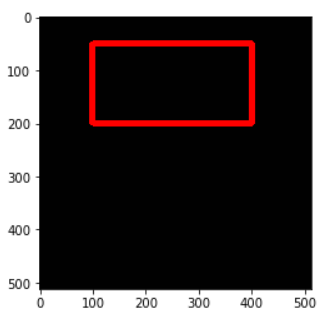
In this example, we are going to draw a simple rectangle on the blank image whose line is red in color and line thickness is 10.
We generate the empty image and pass it to cv2.rectangle() along with the two vertices coordinates of the rectangle, rgb value of red (255,0,0) and thickness = 10.
In [4]:
img1 = generate_blank_image()

cv2.rectangle(img1, pt1=(400,200), pt2=(100,50), color=(255,0,0), thickness=10)

plt.imshow(img1)
Out[4]:
<matplotlib.image.AxesImage at 0x1e14d3e0ac8>

Example – 2 : Draw Filled Rectangle with cv2.rectangle()
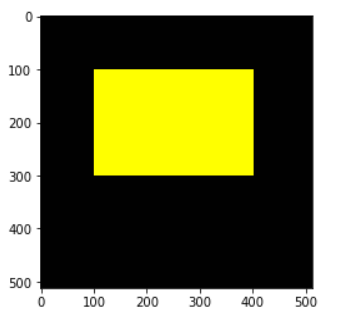
In this example, we are going to draw a rectangle on the blank image which is filled with blue color.
To fill the rectangle we use the thickness = -1 in the cv2.rectangle() function.
In [5]:
img2 = generate_blank_image()

cv2.rectangle(img2, pt1=(400,300), pt2=(100,100), color=(255,255,0), thickness= -1)

plt.imshow(img2)
Out[5]:
<matplotlib.image.AxesImage at 0x1e14e640ba8>

Example – 3 : Draw Rectangle on Image with cv2.rectangle()
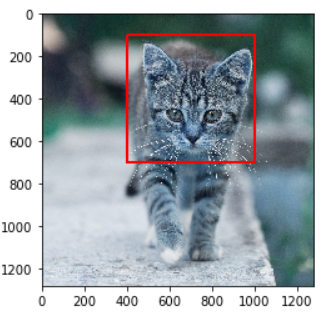
In this example, we are using a real image of cat and drawing the rectangle over it in red color. We have manually calculated the values of pt1 and pt2 so that the rectangle is drawn properly on the cat’s face.
In [6]:
img3 = cv2.imread('cat.jpg')
cv2.rectangle(img3, pt1=(400,100), pt2=(1000,700), color=(255,0,0), thickness=10)
plt.imshow(img3)
Out[6]:

Conclusion
Hope you found this short tutorial on how to draw rectangles in OpenCV quite helpful. We covered the syntax of the cv2 rectangle() function along with different types of examples for a better understanding of beginners.
Reference – OpenCV documentation
-

MLK is a knowledge sharing community platform for machine learning enthusiasts, beginners and experts. Let us create a powerful hub together to Make AI Simple for everyone.
View all posts


