Introduction
In this tutorial, we will explain how to scale and resize image in Python by using the OpenCV function cv2.resize(). We shall first cover the syntax of cv2.resize() and understand its various parameters and options. Then we will see various examples of resizing the images using this function.
Resizing Image using OpenCV : cv2.resize()
Syntax
cv2.resize(src, dsize, fx, fy, interpolation)
- src – This is the input image that needs to be resized.
- dsize – The size of the output image, given as (width, height)
- fx – This denotes the scale factor along the x-axis
- fy – This denotes the scale factor along the y-axis
- interpolation – Denotes the interpolation techniques, default is cv2.INTER_LINEAR
Some Points to Consider about cv2.resize()
- You may use either dsize or both fx and fy to resize the image.
- dsize parameter can be used to specify the exact image size. But for this, you will have to calculate the width and height of the resized image beforehand.
- fx and fy are good options if you want to scale the image with a factor. For e.g. 0.5 for half, 2 for double, etc.
Interpolation Parameters for cv2.resize()
To resize the image, the cv2 resize() function uses interpolation for resizing. This is because when the image is scaled up it needs more pixels to fill up the spaces between actual pixels. And when the image is scaled down it needs to
- cv2.INTER_LINEAR – It uses bilinear interpolation, which is preferably used for scaling up the image to a larger size. This is the default option in cv2.resize()
- cv2.INTER_NEAREST – It uses nearest-neighbor interpolation, which is fast but produces blocky images.
- cv2.INTER_AREA – It uses pixel area interpolation which is better used for downscaling the image.
- cv2.INTER_CUBIC – It uses bicubic interpolation over a 4 x 4 pixel
neighborhood. It is relatively slow. - cv2.INTER_LANCZOS4 – It uses Lanczos interpolation over an 8 x 8 pixel
neighborhood, it produces the highest quality but is slow.
Examples of cv2.resize() in Python OpenCV
Let us start by importing the OpenCV library as shown below-
In [0]:
import cv2
import matplotlib.pyplot as plt
Read Sample Image and Display
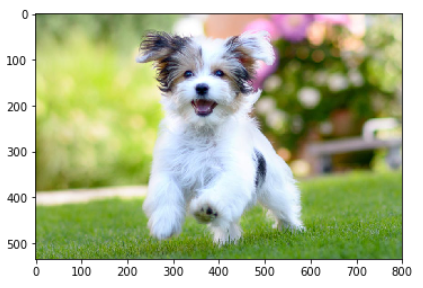
Next, we will read a sample image for our example and display it. We can see the original size of the image is 800×534
In [1]:
#read image
img=cv2.imread("dog.jpg")

print('Image Width is',img.shape[1])
print('Image Height is',img.shape[0])
plt.imshow(cv2.cvtColor(img, cv2.COLOR_BGR2RGB))
Out[1]:
Image Width is 800
Image Height is 534
Example – 1: Resize the Image to Half By Calculating Pixel Size
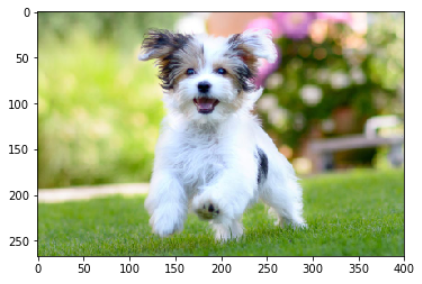
To resize the image to half, we first calculate the pixel size of width and height for the new image and then pass it to cv2 resize() function. It can be seen that the width and height of the new image are half of the original image.
In [2]:
#Calculating the Pixel Size for Resizing
new_width = int(img.shape[1]/2)
new_height = int(img.shape[0]/2)

img_half = cv2.resize(img, (new_width, new_height))

print('Image Width is',img_half.shape[1])
print('Image Height is',img_half.shape[0])
plt.imshow(cv2.cvtColor(img_half, cv2.COLOR_BGR2RGB))
Out[2]:
Image Width is 400
Image Height is 267
Example – 2: Scaling Down the Image to Factor 0.5 (Half)
This is another way of resizing the image to half by passing the value of x-axis and y-axis factor parameters as 0.5 to the cv2 resize function. In this case, there is no need to calculate the pixel size of the new image.
In [3]:
img_half = cv2.resize(img, None, fx = 0.5, fy = 0.5)

print('Image Width is',img_half.shape[1])
print('Image Height is',img_half.shape[0])
plt.imshow(cv2.cvtColor(img_half, cv2.COLOR_BGR2RGB))
Out[3]:
Image Width is 400
Image Height is 267
Example – 3: Resize the Image to Double By Calculating Pixel Size
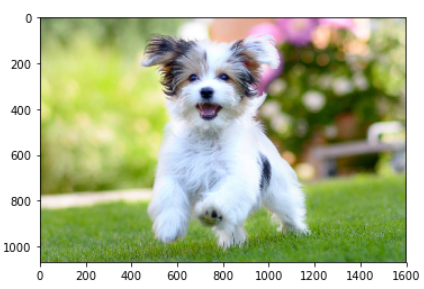
To double the image size, first, the pixel size of width and height for the new image are calculated and then they are passed to the cv2 resize() function. It can be seen that the width and height of the new image are double of the original image.
In [4]:
#Calculating the Pixel Size for Resizing
new_width = int(img.shape[1]*2)
new_height = int(img.shape[0]*2)

img_double = cv2.resize(img, (new_width, new_height))

print('Image Width is',img_double.shape[1])
print('Image Height is',img_double.shape[0])
plt.imshow(cv2.cvtColor(img_double, cv2.COLOR_BGR2RGB))
Out[4]:
Image Width is 1600
Image Height is 1068
Example – 4: Scale Up the Image to Factor 2 (Double)
This is another way of scaling up the image to double the size by passing the value of x-axis and y-axis factor parameters as 2 to the cv2 resize function. Here, there is no need to calculate the pixel size of the new image.
In [5]:
img_double = cv2.resize(img, None, fx = 2, fy = 2)

print('Image Width is',img_double.shape[1])
print('Image Height is',img_double.shape[0])
plt.imshow(cv2.cvtColor(img_double, cv2.COLOR_BGR2RGB))
Out[5]:
Image Width is 1600
Image Height is 1068