Introduction
In the Harry Potter franchise, there was a piece of magical cloak called ‘the indivisibility cloak’ that could make you invisible if you wear it. It looked so cool and caught everyone’s imaginations especially the children. But you know what is cooler – making your own invisibility cloak using OpenCV Python and we will teach you how to do it yourself.
But before going into the direct implementation part, we will explain to you the concept of Masking because it plays a fundamental role in creating an invisibility cloak in OpenCV Python.
Understanding Masking in Image Processing
Masking is the process of modifying an image by applying a Mask. Here Mask is an image where whose pixel intensities are either zero or one i.e. binary. When the mask is applied to the image the pixels (of the image) that coincide with the zero in the mask are turned off. Similarly, the pixels that coincide with one remain the same. This is exactly like the bitwise AND operation.
What Is Masking Used For?
Masking has various use cases in digital image processing –
- Independence i.e. the user can freely define a completely arbitrary shape to extract from the image and it is possible with masks.
- It can be used for image segmentation, editing, and, altering.
- Add layers onto an image with the intention of noise reduction.
- Automatically shield sensitive parts of images.
- Masks are non-destruction i.e they do not alter the original image thus all data is conserved and safe.
Refresher of Arithmetic Operations on Images in OpenCV
OpenCV provides functions to perform arithmetic operations like AND, OR, XOR, and NOT on images. These operations are useful to apply masking.
We define numpy zero arrays and draw some shapes(rectangle and a circle) on them in white i.e. color (255,255,255). We will be performing AND, OR, NOT, XOR operations on these two arrays and see their output.
import numpy as np
import cv2

rectangle = np.zeros((300, 300), dtype = "uint8")
cv2.rectangle(rectangle, (25, 25), (275, 275), 255, -1)

circle = np.zeros((300, 300), dtype = "uint8")
cv2.circle(circle, (150, 150), 150, 255, -1)
Output:
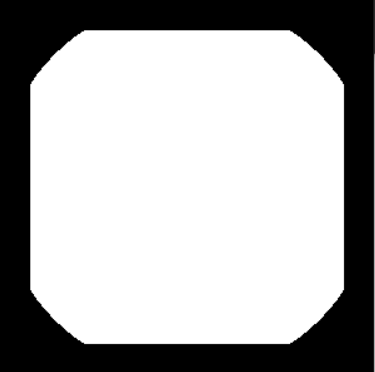
i) AND Operation
A two-input operation that returns true if and only if both the inputs are true (or 1).
bitAnd = cv2.bitwise_and(rectangle, circle)
ii) OR Operation
A two-input operation that returns true only if one of the inputs is true (or 1).
bitOr = cv2.bitwise_or(rectangle, circle)
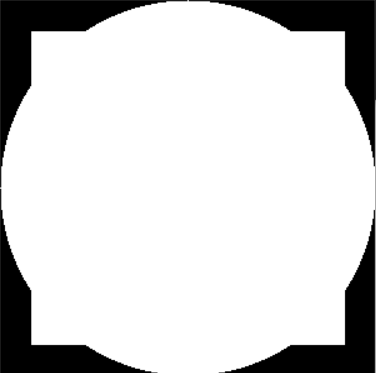
iii) NOT Operation
NOT is a single input operation that reverses the value of the input. In this case, it converts all pixels with value 1 to 0 and vice versa.
bitNot = cv2.bitwise_not(circle)

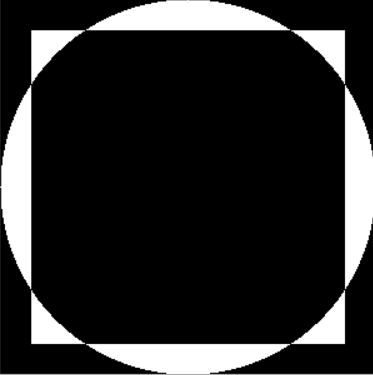
iv) XOR Operation
The XOR, or exclusive or operation can be summarised as a function that returns true only if the two operands are different. Example Input(1,1) or Input(0,0) results in false(or 0) but Input(1,0) or Input(0,1) is true(or 1).
bitXor = cv2.bitwise_xor(rectangle, circle)
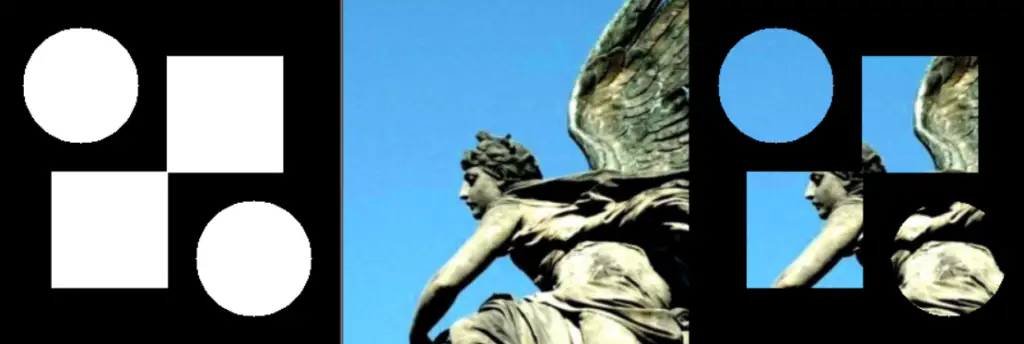
Masking on Images
Masking is generally done by using the bitwise AND function. This function takes an additional input called the mask. We pass the value of our mask which will then allow us to only show the parts of the image which are active in the mask.
- Define a numpy array (zeros) equal to the shape of the image (on which masking is to be performed).
- Define your ROI and apply it to the mask (Making a circle or a rectangle with white color)
- Apply the bitwise AND operation
The first two arguments to the bitwise_and() function need to be the query image. Since the dimensions of the mask and the query are not the same. Finally, define the mask variable as the third argument.
# Step 1
mask = np.zeros((300, 300), dtype = "uint8")
# Step 2
cv2.rectangle(mask, (50, 250), (150, 150), 255, -1)
cv2.rectangle(mask, (150, 150), (250, 50), 255, -1)
cv2.circle(mask, (75, 75), 50, 255, -1)
cv2.circle(mask, (225, 225), 50, 255, -1)
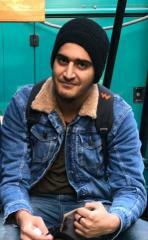
img = cv2.imread('image.png')
img = cv2.resize(img,(300,300),cv2.INTER_AREA)
bitwiseAnd = cv2.bitwise_and(img,img,mask=mask)
# Step 3
cv2.imshow("Masked image",bitwiseAnd)
cv2.waitKey(0)
Output:
Invisibility Cloak using OpenCV Python
Approach
The approach that is followed to build an invisibility cloak in OpenCV python is the opposite of the green screen techniques used in the movie. In a green screen, we replace the green-colored background with a pre-defined image. But here we will be replacing the foreground (blue-colored foreground to be exact) with a pre-defined image.
Steps
- Save an image with the name ‘background.jpg’. The color we choose will automatically be replaced with the image to give an illusion of invisibility.
- Fetch frames from a webcam and converting the color space from BGR (Blue, Green, Red) to HSV (Hue, Saturation, Value).
- Create a mask for values that lie between the upper and lower values of the blue color. The positions at which the color is present have values of 1, others 0. (You can change these values in the code to make different colors disappear).
- Perform the bitwise AND operation on the background image using the mask. This instance represents all the things present in the image that have a color that lies in the range we defined. (Wherever the color is detected is replaced by the predefined background image)
- The bitwise NOT operation is applied on the mask to reverse the pixel values of the instance created in the 2nd step. (It will later be used to remove the pixels(of the selected color) in the webcam frame).
- Perform the bitwise AND operation on the webcam frame using the mask created in the above steps. This helps us to choose the pixel values belonging to the color selected and remove them.
- The final result will be the addition of the result of steps 6 and step 4 i.e. the values of the masked background image are added to the masked webcam frame be added to it later.
Implementation Code
import cv2
import numpy as np

cap=cv2.VideoCapture(0)
back = cv2.imread('background.jpg')

while cap.isOpened():
    ret,frame = cap.read()
    if ret:
        hsv = cv2.cvtColor(frame,cv2.COLOR_BGR2HSV)
        #cv2.imshow("HSV",hsv)


        l_blue=np.array([90,70,50])
        u_blue=np.array([128,255,255])

        mask = cv2.inRange(hsv,l_blue,u_blue)
        cv2.imshow("Mask",mask)

        part1 = cv2.bitwise_and(back,back,mask=mask)
        cv2.imshow("Half",part1) # all things blue

        mask=cv2.bitwise_not(mask)
        cv2.imshow("New mask",mask) # all things not blue

        part2 = cv2.bitwise_and(frame,frame,mask=mask)
        cv2.imshow("Final",part2+part1)

        if cv2.waitKey(5) == ord('q'):
                break


cap.release()
cv2.destroyAllWindows()
Explanation of Code
Line 4: Create a webcam instance using the ‘videocapture’ function.
Line 5: Define the pre-defined background image
Line 7-9: Initialize a while loop and iterate through the frames of the video.
Line 10-15: Convert the webcam frame to HSV and define the HSV range for the blue color.
Line 17-18: Using the ‘cv2.inRange’ function create a mask in the range defined in the previous lines.
Line 20-21: Use the bitwise AND operation on the background image and the mask created in the previous step.
Line 23-24: Reverse the mask from line 16 using the bitwise NOT.
Line 26-27: Apply the AND operation again, this time on the webcam frame and the inverted mask from line 22
Line 29-30: If the user clicks the ‘q’ it breaks the loop and execution stops.
Line 33-34: Release the webcam instance and destroy all lingering/unclosed windows.
Demo of Our Invisibility Cloak
Conclusion
Hope you found this cool project implementation of an invisibility cloak in OpenCV python quite useful. You can use this to impress your friends and family. The source code can be found below –
- The Invisibility Cloak OpenCV Python source code is Here
- Use this script to click a background image using OpenCV (run and press q key)–> Here
Also Read – Lane Detection Tutorial in OpenCV Python using Hough Transform