Introduction
YOLOV4 is a state-of-the-art object detection model from the YOLO (You Look Only Once) family of object detectors. We already covered its introduction in the earlier post where we showed how to use the pre-trained YOLOv4 model. In this article, we will show you a tutorial on how to train the custom YOLOV4 model for object detection in Google Colab with GPU.
- Also Read – YOLOv4 Object Detection Tutorial with Image and Video : A Beginners Guide
- Also Read – Tutorial – YOLOv5 Custom Object Detection in Colab
Annotation of Custom Data for YOLOv4
i) Basics
In order to train an object detector, we need to have a dataset of labeled images that helps our model to understand what it needs to detect and how.
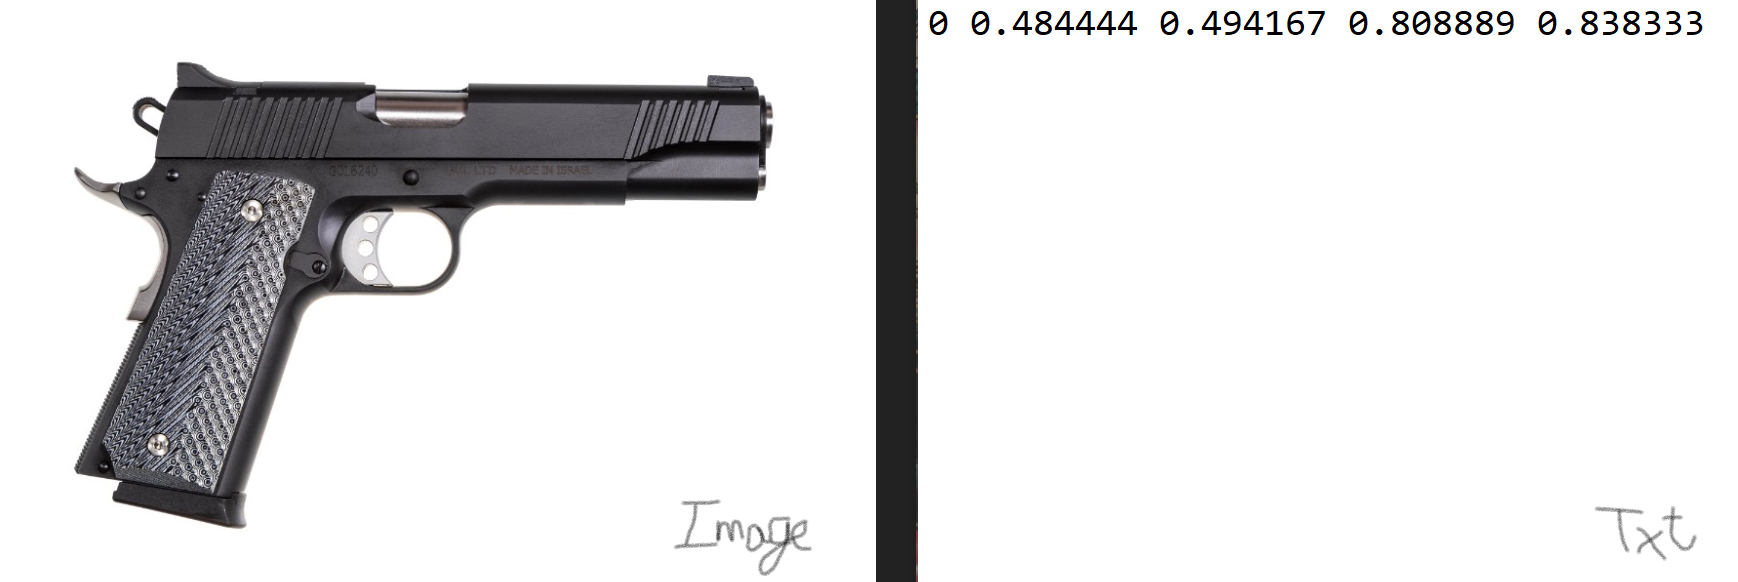
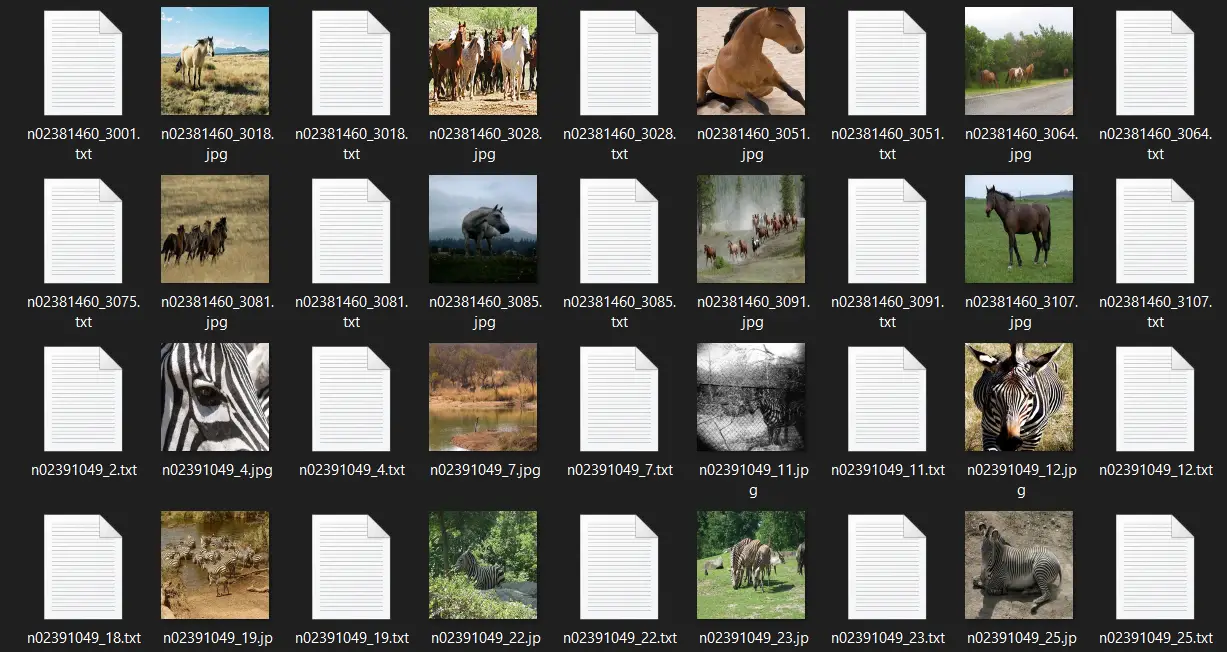
To train custom YOLOv4 object detection we are required to have training image data in a specific format – each image should have a corresponding file that contains the coordinates of the objects present in the image.
An example of training data for YOLOv4 is shown below –
ii) About Data Annotation Tool LabelImg
You can annotate custom training data for YOLOv4 by using the LabelImg tool from this Link for Linux or Windows systems.
The annotation steps with LabelImg mostly consist of these three steps –
- Provide the images directory along with the output directory (where you want to save the corresponding text files). Generally, they are both stored in the same place
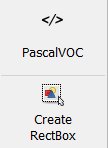
- Change the format from PascalVOC to YOLO.
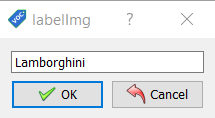
- Label each object (by drawing bounding boxes around them) in each image with its respective name (labelImg automatically assigns zero-indexed ids to the classes).
iii) Annotation of Custom Data for YOLOv4
Let us see a quick tutorial of how to use LabelImg tool to annotate custom YOLOv4 training images –
1. Open LabelImg and select the ‘Open Dir’ option here, go to the directory where you have saved your images.
2. Next, select the ‘Change Save Dir’ and move to a directory where you want to save the annotations(text files)(You can leave it as it is and the images and text files will be saved in the same folder).
3. Change the pascalVOC format to YOLO by clicking on it.
4. Now click the ‘Create Rectbox’ button and create a bounding a bounding box around the objects you want to detect. Next, add the name of the class the object belongs to.
This will create a classes.txt file which you have to delete. We delete it because the names of the classes will be defined in a separate file later.
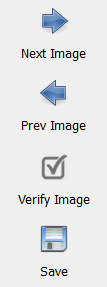
5. Click on ‘save’ (in the sidebar) to save the annotation.
6. Click on ‘next’ to open the next image for annotation. Do this for all the images in the dataset.
You can also watch this Youtube Video for a better understanding of the annotation process with LabelImg.
Important Sidenote: Images and text files are expected to be in the same folder so both the directories in step can be the same. LabelImg makes a ‘classes.txt’ by default in the directory. You should remove that from the folder and place it aside.
Environment Setup
i) Setting Up Google Colab
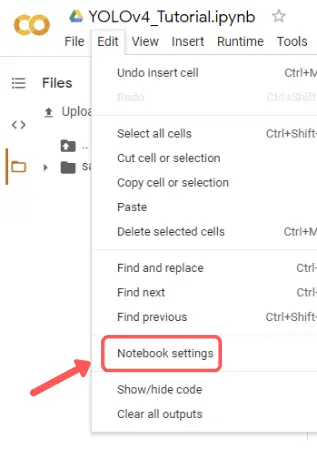
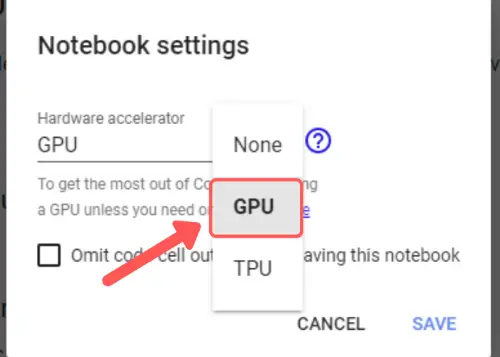
We are going to leverage the free GPU available with Google Colab for training our custom YOLOv4 model for object detection. For this, visit the top ‘edit’ menu in Colab and go to change runtime to GPU.
ii) Checking GPU Version
Google Colab is a free GPU service in the cloud. At max, you can use the GPU for 12 hours. It is similar to a Jupyter notebook i.e. a Linux virtual environment. You can check which kind of GPU is provided to you by running the following command:
!nvidia-smi
+-----------------------------------------------------------------------------+
| NVIDIA-SMI 460.39 Driver Version: 460.32.03 CUDA Version: 11.2 |
|-------------------------------+----------------------+----------------------+
| GPU Name Persistence-M| Bus-Id Disp.A | Volatile Uncorr. ECC |
| Fan Temp Perf Pwr:Usage/Cap| Memory-Usage | GPU-Util Compute M. |
| | | MIG M. |
|===============================+======================+======================|
| 0 Tesla V100-SXM2... Off | 00000000:00:04.0 Off | 0 |
| N/A 33C P0 23W / 300W | 0MiB / 16160MiB | 0% Default |
| | | N/A |
+-------------------------------+----------------------+----------------------+

+-----------------------------------------------------------------------------+
| Processes: |
| GPU GI CI PID Type Process name GPU Memory |
| ID ID Usage |
|=============================================================================|
| No running processes found |
+-----------------------------------------------------------------------------+
iii) Uploading the Dataset
You have to upload the custom dataset that we annotated in the previous section to your Google drive. But in order to access Google drive from Colab, we have to mount the drive into Colab.
Use the following command to do perform the mounting process:
from google.colab import drive
drive.mount('/content/gdrive')
Go to this URL in a browser: https://accounts.google.com/o/oauth2/auth?client_id=947318989803-6bn6qk8qdgf4n4g3pfee6491hc0brc4i.apps.googleusercontent.com&redirect_uri=urn%3aietf%3awg%3aoauth%3a2.0%3aoob&response_type=code&scope=email%20https%3a%2f%2fwww.googleapis.com%2fauth%2fdocs.test%20https%3a%2f%2fwww.googleapis.com%2fauth%2fdrive%20https%3a%2f%2fwww.googleapis.com%2fauth%2fdrive.photos.readonly%20https%3a%2f%2fwww.googleapis.com%2fauth%2fpeopleapi.readonly

Enter your authorization code:
··········
Mounted at /content/gdrive
Once the drive is mounted you can access the data that you uploaded to your drive.
iv) Cloning and Building the Repository
In order to use YOLOv4, we need to clone it using the ‘darknet’ GitHub repository which belongs to Alexey Bochkovskiy who is one of the creators of YOLO. Clone the repository using the below command.
!git clone https://github.com/AlexeyAB/darknet
v) Some changes in configuration
In order to make use of YOLO most efficiently, we make some necessary changes to the ‘make’ configuration file. Basically, we are making sure that OpenCV is installed with CUDA and GPU support in order to make computations faster.
%cd darknet
!sed -i 's/OPENCV=0/OPENCV=1/' Makefile
!sed -i 's/GPU=0/GPU=1/' Makefile
!sed -i 's/CUDNN=0/CUDNN=1/' Makefile
!sed -i 's/CUDNN_HALF=0/CUDNN_HALF=1/' Makefile
!sed -i 's/OPENMP=0/OPENMP=1/' Makefile
vi) Building Darknet
Next, we build the darknet with the below command –
!make
vii) Configuration Files
a) Train.txt File
In order for the training process to start, we have to provide YOLO with a text file containing the paths to all the images in the training set. You can use the below code in the Colab itself to create the file. Just provide the path to your uploaded dataset.
import glob
x = '.jpg'
imglist = glob.glob("/content/drive/MyDrive/train/*{}".format(x),recursive=False)
print(len(imglist))
with open("/content/drive/MyDrive/train.txt",'w',encoding='utf-8') as f:
  for img in imglist:
    img=img.replace("\\","/")
    f.write(img+'\n')
Output:
It will output the no. of images in your provided directory. I personally used a total of 600 images. (300 horses, 300 zebras)
600
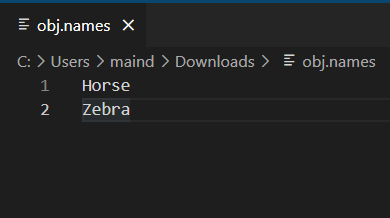
b) Obj.names File
Contents of the ‘obj.names’ file are the names of your classes, same as your classes .txt. So, make a new file ‘obj.names’ (the extension of this file is ‘.names’, not ‘.txt’) in a text editor and copy the contents of ‘classes.txt’ file. Proceed to upload it to your drive.
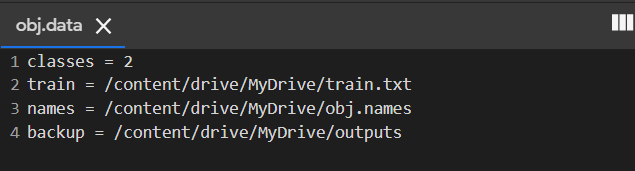
c) Obj.data File
Similarly, you can create an ‘obj.data’ file. This file contains all the info about training path configurations. Use the below template to fill in the necessary details and create the contents of the obj.data file. Note: ‘<‘ & ‘>’ are placeholders please remove them when you fill in the necessary path. After the changes upload it to your drive to be used in colab.(Extension for this file is supposed to be ‘.data’).
classes = <No of classes in your dataset>
train = <path to your train.txt>
names = <Path to obj.names file>
backup = <Path to directory where you weights should be saved>
- Pass the train.txt created in the previous step, obj.names, and lastly, create a new folder named outputs and provide its path in the file.
d) Cfg File
This is by far the most important file it contains the values of all hyperparameters used in the training process. You can explore the file yourself and you will mostly find the following content –
- [net] section: This section holds values to parameters like batch size, subdivisions, no. of steps, burn-in steps, learning rate, etc.
- [yolo] layers: These layers are the actual layers performing object detection they contain coordinates of anchors, loss types, and non-max suppression values. Object detector models perform a combination of classification as well as localization, which is called detection.
- [convolution] layers: Basic convolutional layers along with batch normalization and activation functions.
Download this file or simply copy the contents into a text file and save it as ‘yolo-obj.cfg’.
Make the following changes before uploading the file to drive. You can simply use the following File and copy its contents.
(Extension for this file is supposed to be ‘.cfg’)
Changes
- batch = 32 and subdivisions = 16
- width = 416,height = 416 (larger will slow down training)
- max_batches = (No of classes) * 2000 (but no less than 6000 Ex: for 4 classes would have max_batches=8000)
- steps = (80% of max_batches), (90% of max_batches) (so if your max_batches = 10000, then steps = 8000, 9000)
- classes= no.of classes in your dataset(2 in mine). Change this value in each YOLO layer.
- Before each yolo layer is a convolutional layer, change the filters according to this formula: filters = (No. of classes + 5) * 3 (so if you are training for one class then your filters = 18, and 21 for 2 classes and so on.)
viii) Downloading Initial Weights
In order to make sure our object detector is accurate, we use pre-trained weights instead of random weight initialization. It also helps our model to converge quickly i.e. less training time than normal.
!wget https://github.com/AlexeyAB/darknet/releases/download/darknet_yolo_v3_optimal/yolov4.conv.137
Training Custom YOLOv4 Object Detection Model
i) Training Command Syntax
We first need to understand the following command-line syntax and the parameters for training the custom YOLOv4 model with darknet.
!./darknet detector train <path to obj.data> <path to custom config> <path to weight file> -dont_show -map<path to obj.data>: Path to obj.data.<path to custom config>: Path to obj.cfg file.<path to weight file>: Path to the downloaded(yolov4.conv.137) weight file
ii) Starting Training
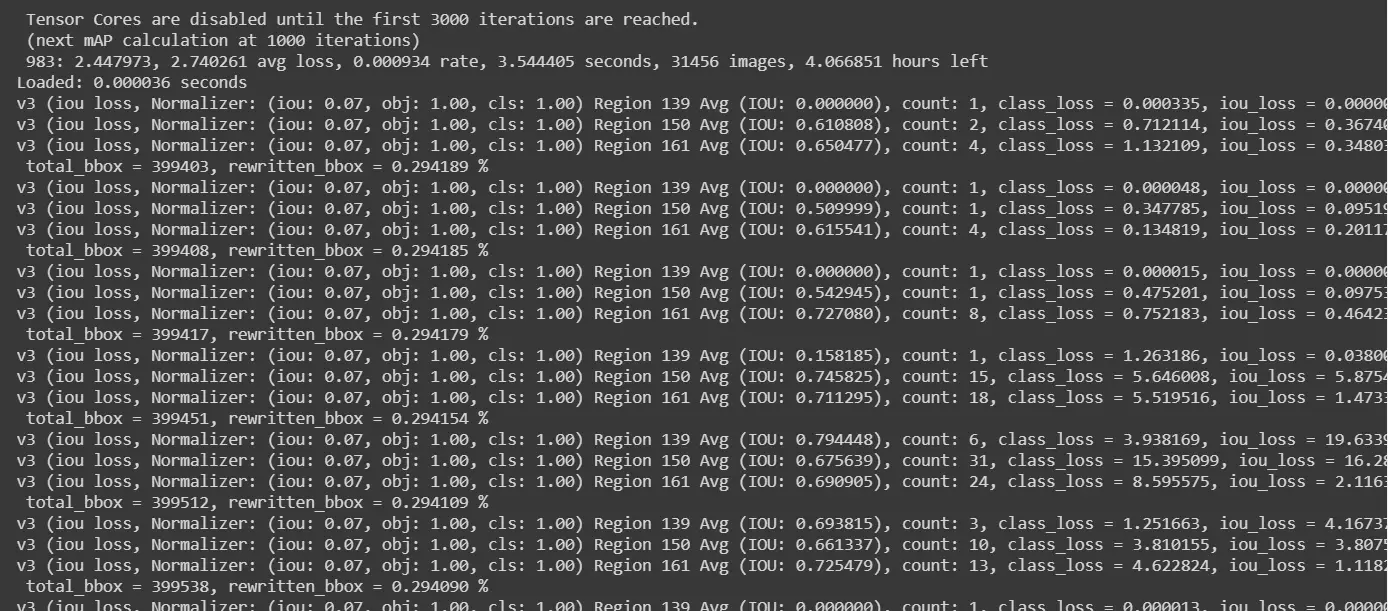
Finally, we start the training process as below –
!./darknet detector train /content/drive/MyDrive/obj.data /content/drive/MyDrive/yolov4-obj.cfg /content/darknet/yolov4.conv.137 -dont_show -map
iii) Resumption of Training if Colab Disconnect
Even though Colab offers free GPU, it has a serious and frustrating drawback – the session disconnects when the browser window remains closed or idle. Your complete training may go for a toss and you have to start again. But we have you covered here!
Remember the backup path that we provided to save weights?. It will come in hand if in any case google Colab is disconnected. It will have a file names ‘obj-last.weights’ saved and you can just continue training using the below command.
!./darknet detector train /content/drive/MyDrive/obj.data /content/drive/MyDrive/yolov4-obj.cfg <path to last.weights> -dont_showTesting Our Model
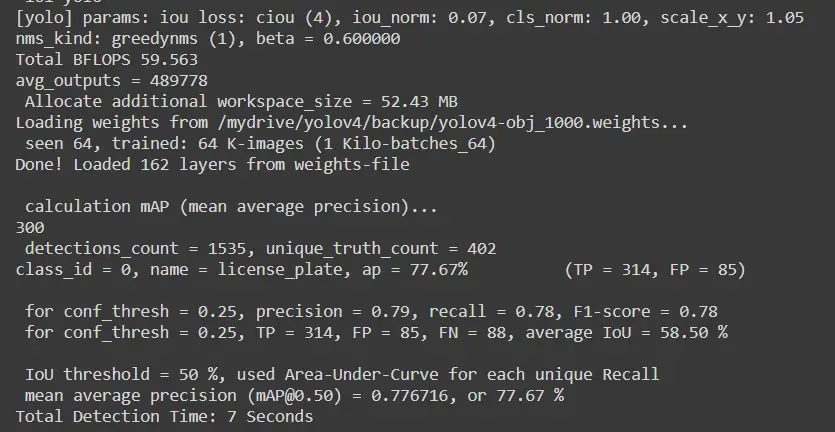
i) Checking the mAP
We can see it’s around 77 percent which is a pretty good score.
!./darknet detector map /content/drive/MyDrive/obj.data /content/drive/MyDrive/yolov4-obj.cfg /content/drive/MyDrive/outputs/yolov4-obj_1000.weights
ii) Test Command Format
!./darknet detector test <path to obj.data> <path to cfg file> <weight file> <query image/video> -thresh <x>
<path to obj.data>: Path to obj.data.<path to custom config>: Path to obj.cfg file.<path to weight file>: Path to the weight file you want to run detections with<query image>: Path to the image you want to run detections on.<x>: Minimum confidence value i.e. threshold.
iii) Testing Our Custom YOLOv4 Model
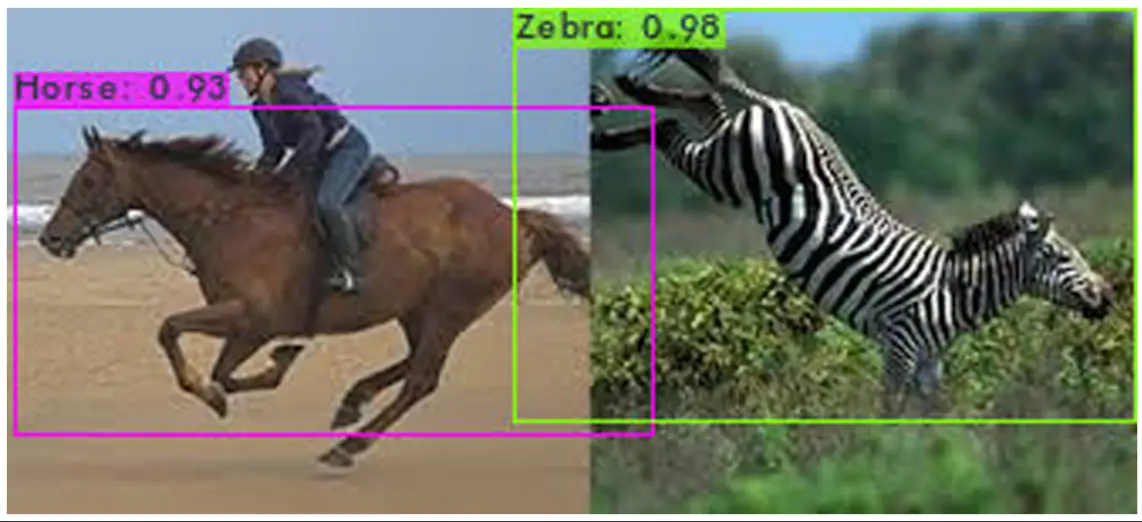
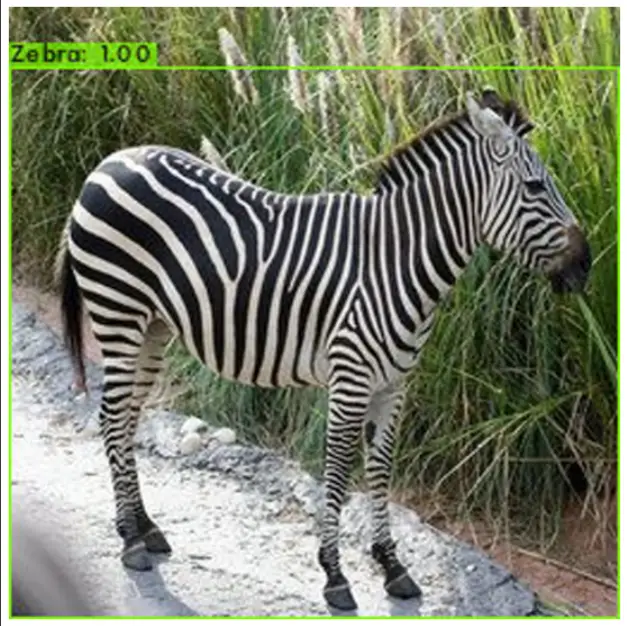
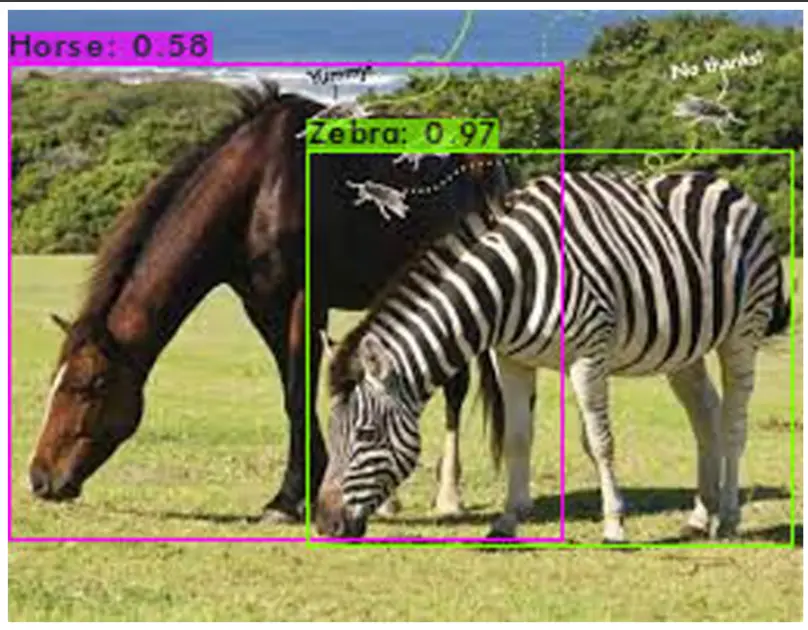
Let us run our custom YOLOv4 model on some images and see the results visually.
!./darknet detector test /content/drive/MyDrive/obj.data /content/drive/MyDrive/yolov4-obj.cfg /content/drive/MyDrive/outputs/yolov4-obj_last.weights /mydrive/images/car2.jpg -thresh 0.3
Loading weights from /content/drive/MyDrive/outputs/yolov4-obj_last.weights...
seen 64, trained: 76 K-images (1 Kilo-batches_64)
Done! Loaded 162 layers from weights-file
Detection layer: 139 - type = 28
Detection layer: 150 - type = 28
Detection layer: 161 - type = 28
/content/drive/MyDrive/testfolder/test3.jpg: Predicted in 32.792000 milli-seconds.
Horse: 93%
Zebra: 98%

iv) Testing Custom Our YOLOv4 Model On Video
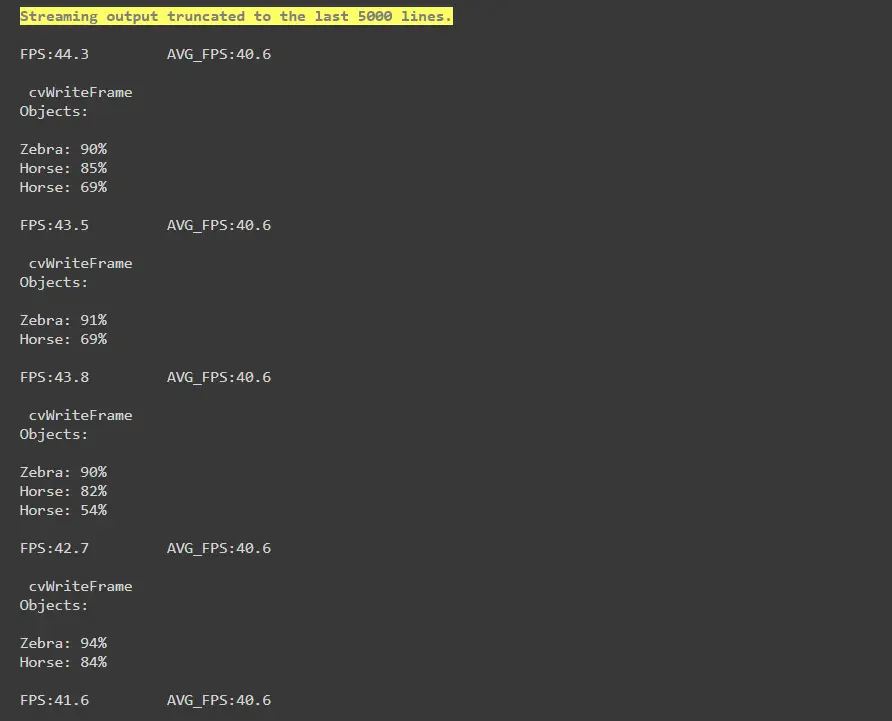
Let us run our custom YOLOv4 model on a video and see the results. Clearly, it is able to detect Horse and Zebra in the video pretty well!
!./darknet detector demo /content/drive/MyDrive/obj.data /content/drive/MyDrive/yolov4-obj.cfg /content/drive/MyDrive/outputs/yolov4-obj_last.weights /content/drive/MyDrive/TestVid.mp4 -out_filename res.mp4 -dont_show -thresh 0.3
Output:
- Also Read – YOLOv4 Object Detection Tutorial with Image and Video : A Beginners Guide
- Also Read – Tutorial – YOLOv5 Custom Object Detection in Colab